Pages

Wednesday, November 24, 2010

Making it your own.....

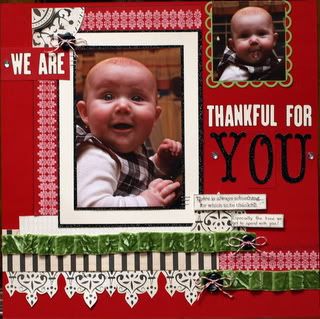
For my layout this week, I headed back to my pile of "must scrap" pictures. I pulled out this adorable picture of Ruby from last Christmas. It is hard to believe she is already 16 months old. We sure do miss them, and wish they lived closer so we could see the little munchkins more often.

I wasn't sure where to start, so I grabbed the most recent "new" item on hand and went with it. The November SOTM just happened to be the newest thing in my stash, so the creative process began! I pulled out the catalog / idea book to see what example projects they had with the stamp set and knew immediately that the title was perfect for the picture I had picked out. I used the basic format of the layout for my design, but added some things to "make it my own".

Whenever I am at a creative roadblock, I go looking through blogs, idea books, sketches, etc. until something catches my eye. This gives me a great starting point. I may pull the title idea, the layout design, the color combination, or some small little part that inspires me to create something.

How can you not smile when you look at this little chunky monkey.........
Photobucket

I used the quote "There is always something for which to be thankful." for part of the journaling from the November SOTM set. Other products used.....
PP - My Lord from Upstairs Downstairs line by Ruby Rock-It
- Jetsetter Black Glitter Factory by Reminisce
- Colonial white, Tulip, and Sweet Leaf CTMH cardstock
Tools - Quikutz - Oatmeal font
- Cricut Storybook cartridge
- Spellbinders - Lacey squares
Embellishments - Spinich ribbon by American Crafts
- Tim Holtz Tiny Attacher
- Cherry Twist thread by Shabby Green Door
- Black buttons
- CTMH sparkles (Z1104)
Stamp Sets - Boutique Borders (D1332)
- A Little Thanks (D1444) - only available until the end of the month....
Ink - Colonial White and Black

*******WHITE INK TIP***** Because the white inks are pigment, they need some drying time after stamping. After stamping be careful not to touch until dry or ink will smear. You can also hit it for a couple seconds with the heat tool to speed up the process. I always wash my stamps with a little dish soap and water immediately after using as well because the ink tends to "stick" to the stamps more than other inks.

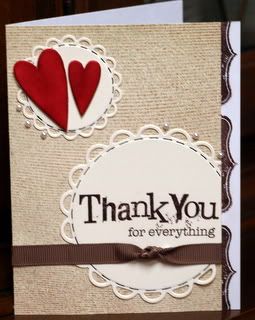
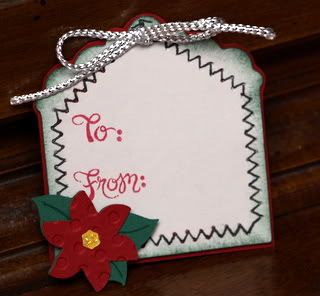
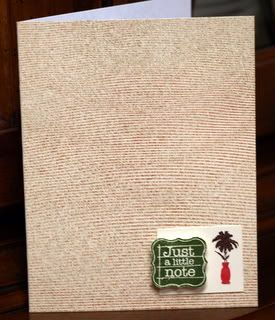
After finishing the Layout, I made a couple quick cards with the SOTM set and a few gift tags with the Cricut. The Thank You card was my interpretation of one of the card examples CTMH had in the idea book as well.
Photobucket
Photobucket
Photobucket
If you would like more information on any of the CTMH used, let me know!

NOW THE BEST PART!!!!

CTMH BLACK FRIDAY SALE.......
Since November is about giving, I wanted to give a little something extra to my customers as a Thank you for your business. This sale is offered by me, so in order to get Free items, contact me directly so I can submit order to include free items.

Spend $25, pick a FREE marker
Spend $50, pick a FREE ink pad
Spend $75, pick a FREE ink pad and marker
Spend $100, get a FREE ink pad, marker, and I will pay 1/2 the shipping costs on your entire order. This would also qualify you for the November CTMH special and you would get the SOTM set I used in the projects above for FREE and pick any other stamp set in the current idea book for FREE. This would be a savings of around $60!!!

I will be offering the sale for one day only! Black Friday of course! You can email me your order at angiehighland@myctmh.com anytime on Friday. I will call you Friday evening to set up payment arrangements, shipping, etc. Please be sure to include your phone number with emailed order.

I accept paypal, money order, check, debit / credit card.

Happy Crafting! To sign up for my monthly newletter email me at angiehighland@myctmh.com

Wednesday, November 17, 2010

Desk calendars, post it note pads....

Well, we have all been fighting the "crud" around the Highland house this week. Emily stayed home from school today, and sadly had to miss Basketball pictures tonight. I may have to figure out how to take a group shot after the game Saturday, so I have a picture for the album. She also decided to sign up for girl scouts. The girl loves to be busy. She must get that from me.... Tee Hee!

I have been busy throwing together some last minute craft items to take Friday night to a crop. They are going to have a table set up that you can put homemade items for sale. I am also going to be a CTMH vendor, which I am very excited about! I am so happy I finally have the confidence to give my business my all. I am truly enjoying every minute I get to teach someone a new technique, how to use a paper trimmer, etc.

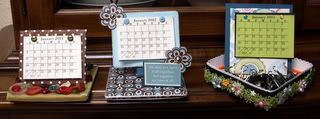
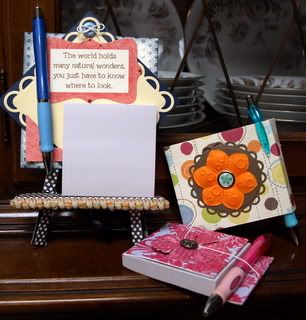
I got this idea from a fellow CTMH consultant on the consultant message board. Little desk calendars...... so cute, and easy to make. The base is a coaster covered with paper, then dressed up with some embellishments. I bought the little 2 x 3 calendars at the dollar store. They came in a pack with 5 of each month and a notepad. So for $4, I have 20 complete calendars and 4 notepads to alter.
Photobucket

These little post it note pads are simple to make. Just attach the post it notes and fold the paper around it to make a holder. I thought they would make cute stocking stuffer. I used a quote from the CTMH twitterpated stickease for the easel note pad holder.
Photobucket

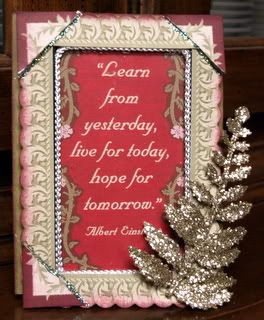
I have been trying to figure out what to do with this CTMH stickease quote. Stuck it in a little frame, dressed it up a little, and voila!
Photobucket

That is my crafting for this week....... Getting prepared for my next newsletter, if you would like to be added to my CTMH monthly newsletter list, email me at angiehighland@myctmh.com
Happy Crafting!

Wednesday, November 10, 2010

little houses.......

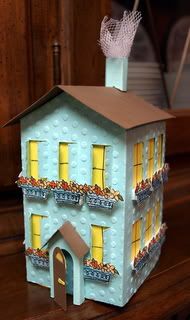
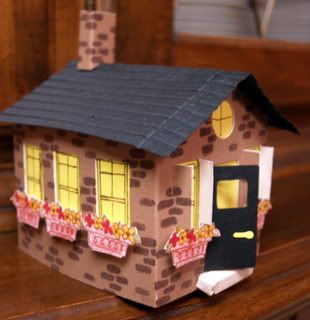
I have been thinking of ways to "wrap" gathering booking incentive gifts. After much thought, I remembered the cute little houses on the Winter Wonderland Cricut cartridge. I knew they would be perfect! A "house" for a home gathering. I have 2 done so far. I love them!!!! So cute! They are going to have special gifts in them for the wonderful hostesses who invite me and a few friends over for a CTMH gathering.

Emily and I are going to make a Christmas village for our dining room table. We are really looking forward to starting the project. I love that Emily likes to work on paper crafting projects with me. This is really great bonding time for the two of us.

I used the Around The block stamp set for the bricks and window boxes. The windows on the brown house are also stamped with a window stamp that is in the set.
Photobucket
Photobucket

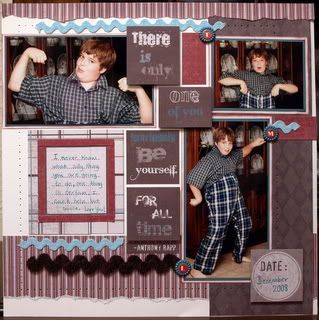
When I went to the Scrapbook Nook in Ludington on Saturday, Vanessa had a new paper line for me to work with. I love the colors for boys and winter! This is the page I did of Tyler, still need to do a winter one this weekend. Going to spend the day scrapping Saturday in her store, so that is on the to do list.
Photobucket
Tyler is always making me laugh with his facial expressions and goofy things he does. I love it when I come home from work feeling cranky, and he turns my frown upside down.

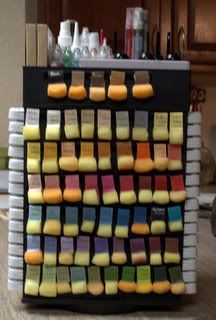
I wanted to share a little organization this week. This is something I had done a couple months ago. I stapled a swatch of CTMH cardstock for each ink color to sponge wedges. This forms a little handle. I then put a little piece of Velcro on the back of each handle, and put some strips of Velcro on the empty side of the ink pad tower. This is the perfect place to stick all the ink sponges. I now have a sponge for each of the 60 colors, easy to reach and find. Never have to worry about having the correct sponge for the correct ink and will not have to rummage through a basket of sponges to find the right one. When a sponge wears out, just make a new one and stick it on. LOVE it!
Photobucket

Tuesday, November 2, 2010

Holiday Trinkets....................

A lot going on in my scrapbooking world right now. I have been working on goal setting. I have been setting goals for years with my scrapbooks. For example.... By the end of the month I want to have 30 pages completed. Often I fail these attempts because the goals I put upon myself far exceed the hours in the day. As I have been working on setting "obtainable" goals, a friend happened to tell me "work smarter, not harder". Suddenly, it all made sense. Do I really need to put all the planning into every page? Do all the pictures need to be scrapped? With this theory in mind. I went through a stack of pictures and picked out the ones that I knew I wanted to scrap. The ones that had a story that I want my kids to remember. I went back to the basics of why I started scrapbooking........to document the memories we create.

Now, I have a stack a small stack of pictures that are on the top of my to do list because they hold a special memory for me. Something I want Tyler and Emily to remember. This small stack seems much more "obtainable" than the 4000 pictures in photo boxes and the countless pictures on my computer. I know there is no way I will ever catch up and that is fine with me. Every page I create is one more memory in the albums that was not there yesterday.

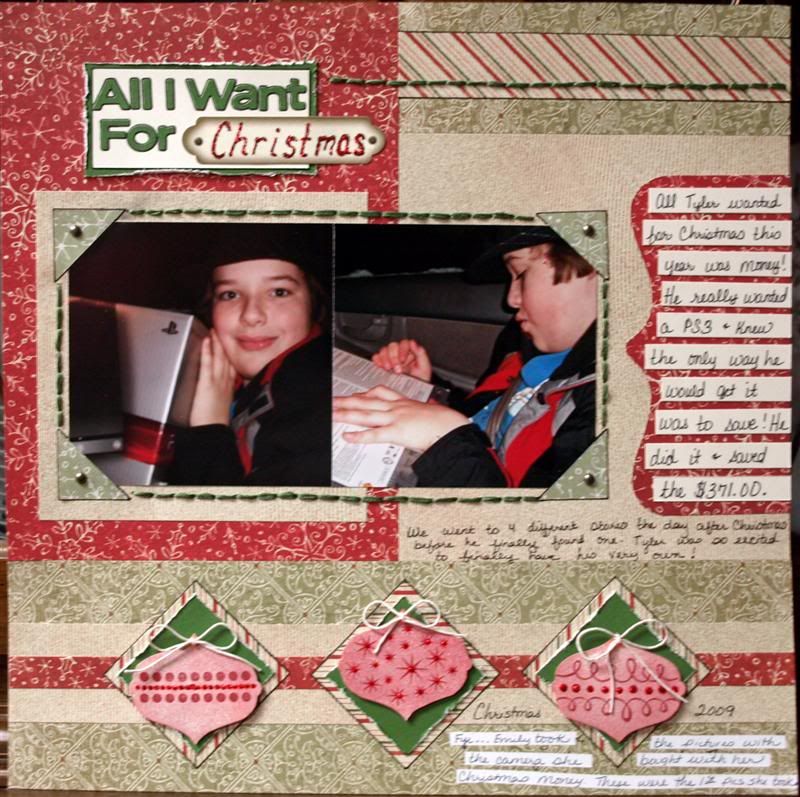
Within my small stack of pictures were 2 pictures of Tyler with his PS3 that he bought the day after Christmas last year. The pictures are not the best, because Emily took them in the backseat of the car with the new camera she bought that day as well. I wanted to scrapbook these pictures because it was a crazy night for us. Tyler had saved his money for a month leading up to Christmas in hopes that he would get enough cash and gift cards for Christmas to purchase a PS3. He told everyone who asked that was all he wanted. He made it, all $371 dollars of it. He was so proud carrying his wallet full of money into Wal-Mart the day after Christmas, only to find out they were sold out. We had to go to 4 different stores to finally find one. I kept trying to reassure him we would find one, even if we had to wait for a few days. Luckily, we did find one. He was even prouder as he payed for it and carried it out of the store. This was his first "big" purchase.

Emily bought a camera with the money she had gotten for Christmas. The entire car ride home, she tried to figure out her camera, while he read his PS3 box. Tyler was her test subject. These were her pictures from the night.

I received the CTMH Mistletoe paper in the mail a few days ago, and knew these pictures from my little stack of pictures would be the next "memory" in the album.

Photobucket

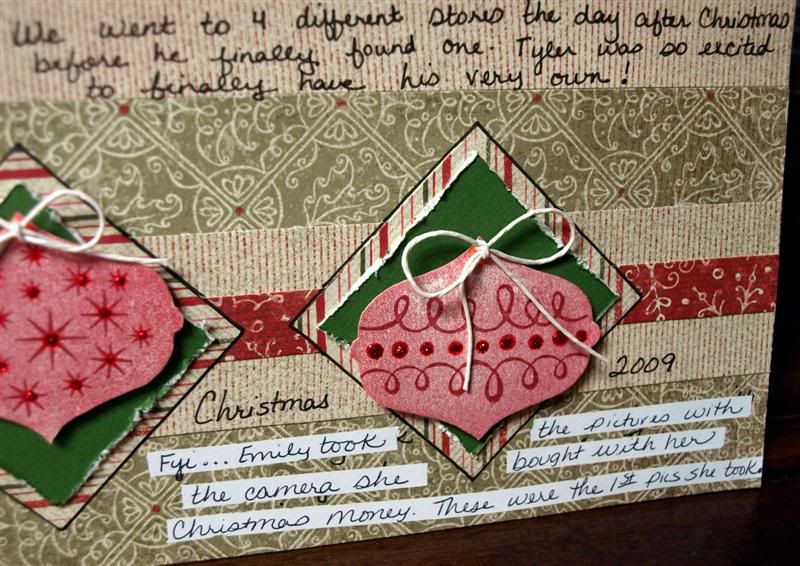
I used the CTMH stamp set Holiday Trinkets (D1366) to stamp the ornaments and the pattern is the Column Composition layout in the Cherish idea book.

Photobucket

Along my journey as a scrapbooker, I have learned a lot of tricks to make things easier. One of my all time favorite things to do is outline. You can see above how I outlined the squares with a CTMH black legacy writer. This little step adds just a little dimension and helps to separate the layers of pattern paper. It is quick and simple. I also outlined the letters in the title for a little added pop. I outline something in nearly every page I do.

I also messed up on the journaling, which as Zane would tell you, I do this on nearly every page as well. Something is usually spelled wrong, or I forgot a word. I use to fret over it, now I just put a strip of white out, rewrite what I wanted to say and call it good. It really does not have to be perfect. I am not perfect, so pages don't have to be either.......

I have started a monthly CTMH newsletter, if you are interested in being added to my email list send me your email at angiehighland@myctmh.com

As always, my website to purchase CTMH products : www.angiehighland.myctmh.com